How To Connect Epson Printer To Chromebook [Easy Guide]
![How to Connect Epson Printer to Chromebook [Easy Guide]](https://activemeblogs.com/upload/post/67a9b7dfe403b_business-woman-with-computer-office.jpg)
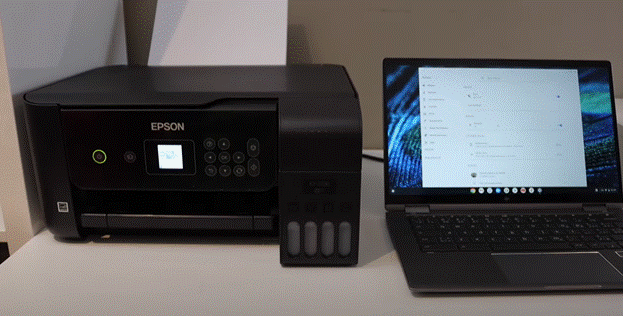
If you are wondering ‘how to connect Epson printer to Chromebook’, let me tell you, it is very easy! With a few simple steps, you can effortlessly connect your printer to a Chromebook. But if you do not know how, then keep reading this post, and you will learn.
Chromebook is a new generation computer that was created by Google and runs on ChromeOS. They are designed to work fast and smoothly and have a great security system, so you do not have to worry about data breaches. To connect an Epson printer to the Chromebook, you should arrange all the necessary items and proceed with the setup process. Once the setup is done, you can connect your device to the printer using USB or via Wi-Fi.
The Process to Set up an Epson Printer
In order How to connect Epson printer to Chromebook, you should first learn how to set up the printer. To set up the printer, unbox it, and check for accessories. Then, put it in a safe place and start setting up the printer. Here's what you need to do:
- Plug in the power adapter and then tap on the power button to turn on the printer.
- There, you will see a control panel consisting of buttons and a home screen. Press the Setup button to activate the home screen. You can use buttons like left, right, up, and down to navigate the screen.
- Now, go to the home screen setup and choose the language you want to work in.
- Then, lift the scanner bed, open the ink lid compartment, and fill the inks according to their matching codes.
- Lastly, load blank papers into the paper tray, and your printing device is ready to use.
How to Connect Epson Printer to Chromebook?
Once you have set the printer up, continue to connect the printer to your Chromebook. You can connect the computer either using Wi-Fi or a USB cable. Follow these simple steps, and connect your printer to the laptop very easily.
Option 1: Through a Wi-Fi Network
Before you connect the printer to Wi-Fi, make sure that your Chromebook is connected to a wireless network. Without this connection, you will not be able to add Epson printer to Chromebook. Follow these steps:
- Firstly, connect your Chromebook to a wireless router.
- On your printer's home screen, press the Setup button to activate it.
- Next, press the OK button and go to Settings.
- In the settings, click on General Settings and press OK.
- Then, choose Network settings and open Wi-Fi Setup.
- The next step is to select Wi-Fi Recommended and then Wi-Fi Setup Wizard.

- Lastly, search for your Wi-Fi, and when you see it, click on it. Your printer will be connected to a router and your Chromebook.
Option 2: With a USB Cable
Here, you will learn the complete procedure of how to connect Epson printer to Chromebook using a USB cable.
- Connect both your printer and the laptop with a wall socket and turn them on.
- Next, take a USB cable and connect it to both the printer and laptop.
- Make sure that the cable is in good condition and not overused or strained. If it is, consider using a new cable.
- When you confirm the cable is functional, connect one end of the cable to the printer and the other end to the Chromebook. It will establish a connection between the laptop and your printer.
Note: After the connection, the printer is almost ready to print. You have to go to the laptop's settings, open the Print and scan section, and search for the printer. When you see the printer, click Add. Your printer will be added and ready to start printing.
Conclusion
Now that you have finished reading the blog, I am sure you have learned how to connect Epson printer to Chromebook. Not only have you learned how to connect your device to the printer, but you also learned how you can set up the printer and prepare it for use. Now, you know how easy it is to connect the printer to a Chromebook. Finally, you can start printing tasks with your Epson printer today.
You can connect your Epson printer to the
Chromebook using a USB cable or Wi-Fi. In the case of a USB cable, you have to
connect the computer and printer at both ends of the cable. To connect them via
Wi-Fi, connect the laptop to a router and then connect the printer to the same
wireless network. Finally, your printer will be connected to the Chromebook.
Yes, of course! Epson printers are
compatible with Chromebook laptops. However, the procedure for connecting
Chromebook laptops may be a little different from that of other laptops like
Windows and Mac. For example, you don't need the Epson iPrint or Epson Connect Setup Utility app on a Chromebook. You can simply add your printer to your
laptop, and then you are good to go.
To get your printer recognized by the
Chromebook, you have to open Settings and
select the Device option. Then,
choose the Print option. When you go
to print, you will see an option Available
printers to save. You have to find your printer in the list and tap on the Save button. Before that, the laptop
will do a compatibility check.


