
How To Connect Canon Printer To Laptop (Easy Step Guide!)
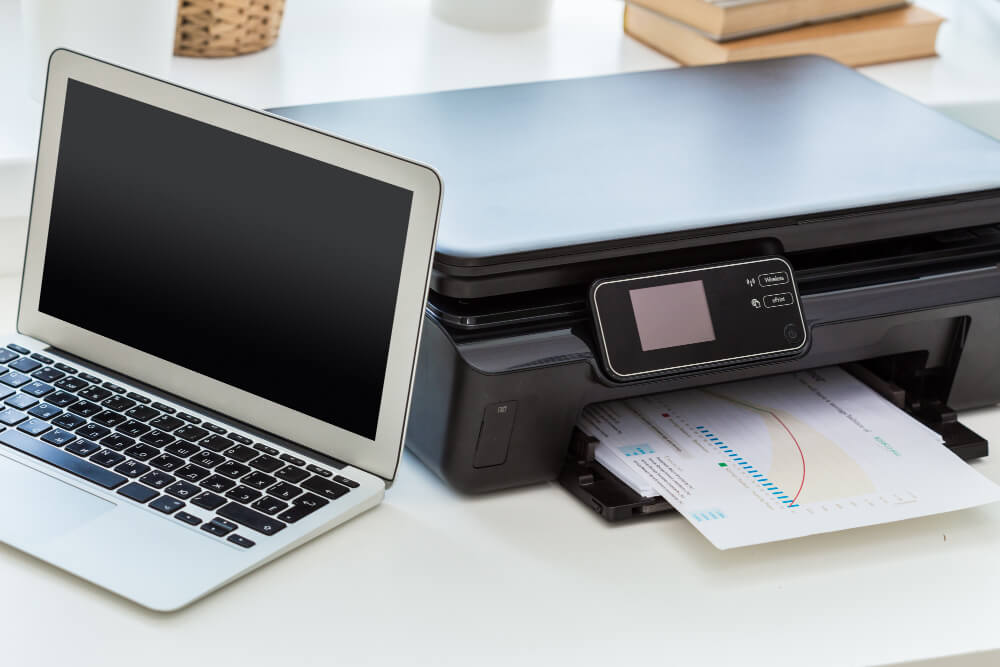
Hey, are you looking for an easy tutorial on how to connect Canon printer to laptop? Chillax, this is going to be a cakewalk. Ever since I started my job as a printer expert, I have provided assistance to printer users. Their concerns included a variety of issues, such as an offline issue or printer setup and connection, among many others. However, I used to deal with all these things.
Later, I started providing my online service so that I could reach more people who were struggling to connect and set up their printers, including troubleshooting printer-related issues. Here, I am going to help you with the printer setup. This blog will be helpful for Windows users. But before I tell you how to connect Canon printer to laptop wirelessly, I will first discuss how to install a Canon printer. Let’s get started now!
How to Install a Canon Printer?
Before I discuss how to connect Canon printer to laptop, I will show you how you can install your printer on your computer. So, without any further delay, let’s get into it:
- First of all, you have to make sure your printer is plugged in and switched on.
- Most Canon printers come with a CD; you can use this to install a program that will help you set up your printer. However, most modern printers can automatically install the software, or you can install it easily from the manufacturer’s site.
- In order to install a CD, insert it into the computer’s CD tray and follow the simple instructions given on the screen.
Note: If your laptop does not have a built-in CD driver, you may require an external CD reader.
How to Connect Canon Printer to Laptop (Windows)?
In the following steps, I will explain how to connect a Canon printer via WPS. In this method, we use Wi-Fi Protected Setup (WPS) to connect our printer to a wireless network. You will not be required to enter any router name or password. However, this method requires you to have a router with a WPS button.
Step 1: First, Click on the Network Button
You can find this option on the printer’s Home screen.
Step 2: After That, Tap Wi-Fi
When you tap the Wi-Fi option, it opens the “Wi-Fi settings list” menu.
Step 3: Now, Select Settings
Then, you will need to hit the Settings button located below in the “Wi-Fi settings list” menu.
Step 4: And Then, Select Wi-Fi Setup
After that, you have to click on the Wi-Fi setup given in the Wi-Fi menu.
Step 5: Next, Tap the WPS Push Button
In the Wi-Fi setup menu, you have to select the WPS (Push button method) and click OK.
Step 6: Lastly, Press the WPS Button on a Router
Here, you have to press the WPS button on your Wi-Fi router and continue pressing it while performing the next step. Select OK, which is displayed on your printer screen. After this, you will connect using WPS.
How to Connect Canon Printer to Laptop (Manually)?
When connecting your Canon printer to your laptop manually, you have to check the printer’s instruction manual carefully to see if any specific instructions are given for connecting the printer model to the internet. You can also find the printer’s manual online on Canon’s official website. To do this, you have to go to Support > Manual in the drop-down menu. Click Printers and find the printer model number.
Step 1: Connect the Canon Printer to an Internet
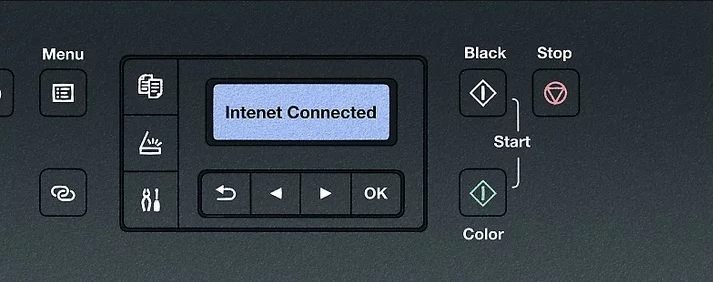
In the first step, you will need to perform the steps on the printer’s LCD panel. There, you will be required to select a wireless network and enter the password.
Step 2: Tap the Setup Button
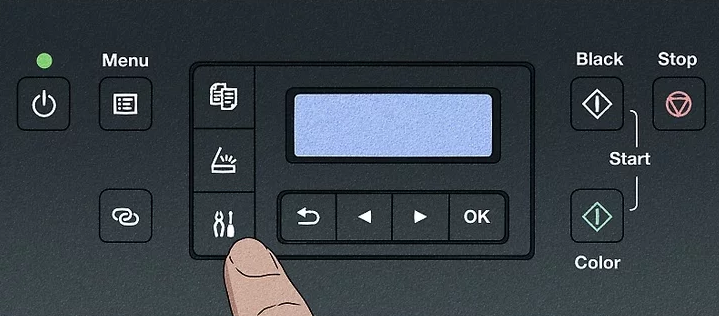
Here, you will see an icon with a screwdriver and pliers. Press this button and then move to the next step.
Step 3: Navigate to Wi-Fi Setup
Now, use the navigation arrow button and head to the Wi-Fi setup.
Step 4: Select Manual Connect
After that, you have to select Manual Connect under Wi-Fi setup.
Step 5: Select a Wi-Fi Network
In this step, you have to select your router. Your router name will appear on the printer’s screen. Ensure you have connected your printer and PC to the same Wi-Fi network.
Step 6: Enter Your Password
Now, you need to enter your router password. After that, you have to hit the OK button for two seconds. You will be prompted to apply; click Yes to apply. Now, you have connected your printer to your network.
Conclusion
In this blog, I explained how to connect your Canon printer to your laptop (Windows PC). Initially, I discussed how to download and install printer drivers using a CD. However, modern printers do not require you to install them via CD, but if you have an old model, you need to know how to perform these steps. Afterward, I covered the steps to connect the Canon printer on Windows in two methods separately in a stepwise manner.
How to connect your printer to your laptop,
follow the steps below:
- First, download the latest software for your printer.
- After that,
launch the file.
- Select the
USB connection at the Connection
Method Selection screen.
- Now, connect
the USB cable between the printer and the PC.
- Next, turn
on the printer.
- Then, select
Next and follow the
instructions displayed on the screen.
- Load the paper and print a test page.
- In the end, select Exit to complete the installation.
If your Canon printer is not connected
via a USB cable, it is because your printer driver is not installed correctly.
To resolve this issue, you have to uninstall the downloaded printer driver and
then reinstall it. Ensure you have connected the printer and USB directly.
After that, you have to restart your device, unplug the USB cable, and plug it
in again once it is restarted.
In order to connect your printer to your
PC via Bluetooth, follow the steps given below:
- First, you need to enable the Bluetooth on your computer.
- Then,
navigate to the Control Panel.
- Next, select
Printers and Devices > Bluetooth
Devices.
- Afterward,
switch on your printer.
- Ensure that
the “My device is set up and ready
to be found” checkbox is selected.
- Now, select Add Device.
- You need to wait for the computer to look for the nearby printers.
- Choose the printer you want to connect to and pair.
 • Jan 19, 2026
How To Add Canon Printer To Windows: A Detailed Guide


 • Oct 13, 2025
How To Scan From Brother Printer To Computer: Full Guide
• Sep 25, 2025How To Fix A Canon Printer Not Printing? (Tutorial Steps)
• Jan 19, 2026How To Add Canon Printer To Windows: A Detailed Guide
• Oct 13, 2025How To Scan From Brother Printer To Computer: Full Guide
• Sep 25, 2025