
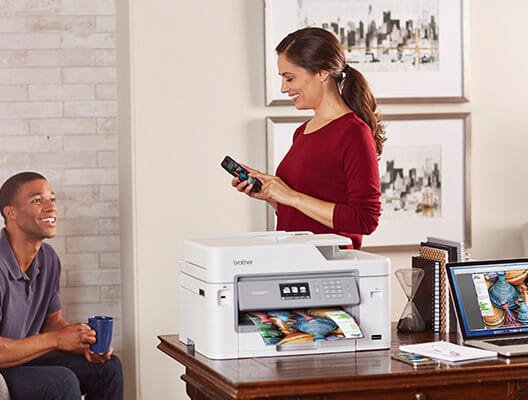
How To Fix A Canon Printer Not Printing? (Tutorial Steps)

The weekend was approaching, and I was ready to print my final-year project with my Canon printer. But luck was not on my side. When I clicked the “Print” option on my PC, nothing happened. The soothing sound of paper sliding out was absent, leaving only silence.
There were no error messages or flashing lights, which left me concerned. I checked the cables and restarted my PC and printer, but there was still no difference. Frustrated, I realized I couldn't afford to waste more time. I’ve been working tirelessly for a very long time.
After some time, I eventually figured out “How to fix a Canon Printer Not Printing”. This is a common hiccup among printer users, and it was as simple as I thought. Before exploring the solutions to fix a Canon printer that does not print, let’s understand the root causes.
Why Isn't My Canon Printer Printing?
You may have asked yourself previously, "Why Is My Canon Printer Not Printing?" One possible reason for the printer not printing issue is a clogged or dried-out printhead. This usually happens if the printer has not been used for a long period or if low-quality ink has been used. The ink flow may become blocked, leading to issues like blank pages or incomplete prints.
Other reasons can include an outdated driver, a poor USB or Wi-Fi connection, a stuck print queue, or an enabled "Use Printer Offline" mode.
How to Prepare Before Fixing a Canon Printer Not Printing Issue?
You must be aware of certain things before troubleshooting the issue. Just take some time to learn the basics so you won’t have to face any frustration later on. Here is what you need to know:
Check for printer status.
Check for print queue errors.
Examine the paper and ink levels.
The printer must be set as the default device on your computer.
Troubleshooting Canon Printer Not Printing Issue
There can be many reasons why the printer does not print. However, it is essential to resolve the issue on time to avoid further complications.
Apply these “how to fix a Canon printer not printing” fixes if you want to get your printer back in form:
Solution 1: Check the Connection
Step 1: First, check that your printer is powered on.
Step 2: If the LED on the control panel isn’t lit, the printer is off.
Step 3: Ensure that it is plugged into an outlet and that the power switch is on.
Step 4: If you’re using a wired printer, then you need to check that all the cables and wires are connected correctly.
Step 5: Unplug and plug the cables back in and check that they are fitted correctly into every port.
Step 6: If you want, you can also use another cable.
Step 7: If you use the printer wirelessly, you must check for a secure connection between the printer and the Wi-Fi router.
Solution 2: Temporarily Disable Firewall
Step 1: In the search bar next to the Windows icon on your computer, type “Windows Defender Firewall.” Once it appears, click on it.
Step 2: On the left-hand side of the Window, click the “Turn Windows Defender Firewall on or off” option.
Step 3: On the Customize Settings window, check the “Turn Off Windows Defender Firewall” option for both Public and Private networks.
Step 4: Tap on the OK button to save all the changes.
Solution 3: Clean Print Head Using Printer’s Control Panel
Step 1: Verify that the LCD screen shows no errors and the output tray is fully extended.
Step 2: Load some sheets of plain paper.
Step 3: Now, on your printer’s control panel, press OK.
Step 4: Go to Maintenance and tap on the Cleaning option.
Step 5: When you see a notification window, hit the “Yes” option.
Step 6: Don’t perform anything else until it is done.
Step 7: When the pattern print confirmation is displayed, choose Yes.
Step 8: Inspect the nozzle and check the pattern to see any gaps in the lines.
Step 9: If you do not see any improvements, do the steps again up to 2-3 times to clean the print head deeply.
Solution 4: Replace Ink Cartridge
Step 1: Power on your printer and open the paper output tray if it’s not open.
Step 2: Lift the printer’s top cover. Hold it open using the support bar.
Step 3: Open the ink cartridge locking cover and remove the cartridge.
Step 4: Unpack the new cartridge and remove the protective tape.
Step 5: Now, take the new cartridge and insert it into the machine until you hear the click sound.
Step 6: Lift the cover and set the support back to its original position. Close it gently.
Tips to Prevent Canon Printer Not Printing Issue
If you don’t want the printer to cause problems like printing blank pages or incomplete prints, you must follow these practical tips:
- Print documents and files once a week to prevent the ink from drying.
- Leave your printer on or in sleep mode.
- Third-party cartridges may result in poor-quality prints.
- Store the spare cartridges upright, airtight, and away from heat or sunlight.
- Always select the right printer settings (paper type, print quality).
- Keep your printer drivers and firmware updated.
Follow these steps to take out the paper jam stuck in your printer:
First, switch off your printer.
Now, open all the machine's accessible covers.
Carefully take out the jammed paper that you see.
Ensure the paper is correctly loaded and does not exceed the tray's capacity.
Sometimes, your printer may only print in black, which is a serious concern. To resolve the issue, you can try certain fixes.
You must check that grayscale printing is not enabled in your printer settings. If it is enabled, you must change the settings to color printing, which will allow you to print in color.
Running a print head cleaning cycle and checking ink levels can also help resolve the “Canon printer black print” issue.
Your printer may be having trouble due to outdated or corrupt printer drivers. Download a suitable driver for your printer model from the official Canon website: "usa.canon.com." Simply type in your printer model and locate the appropriate drivers.
In order to setup a printer, follow the steps below:
First of all, you have to prepare the printer.
To prepare the printer, you need to place it on a flat table.
After that, you will need to install the printer driver.
To download the driver, you can use a CD-ROM and the official site.
Next, connect the printer wirelessly and add it to your device.
If you want to connect your Canon printer to your phone, follow these steps.
Download and install the Canon Print Inkjet SELPHY app on your phone.
Then, verify which Android version you’re using under the Settings option.
Head to the About Phone/My Phone option to check if your phone has the required needs.
If you’re an iOS user, you need a version of 9.0 or the latest.
At last, you need to install the Canon PRINT Inkjet/SELPHY app via the Play Store.
Learn "how to connect your canon printer to a laptop", you can use a wired connection like USB and a wireless connection such as Bluetooth or Wi-Fi. A wireless connection is preferred nowadays due to its convenience. So, you can connect your laptop to the router or access point to set up a wireless connection
Learn how to update your
Canon printer drivers, you’ll have to navigate to ij.start.canon
website on your internet browser.
Then, you have to type your Canon printer’s model number in the
search tab. Thereafter, your screen will display a list of available
printer drivers and an update option. Select the driver package you
want, download it, and install it on your computer.
 • Jan 19, 2026
How To Add Canon Printer To Windows: A Detailed Guide

 • Oct 13, 2025
How To Scan From Brother Printer To Computer: Full Guide
• Sep 25, 2025How To Fix A Canon Printer Not Printing? (Tutorial Steps)
• Jan 19, 2026How To Add Canon Printer To Windows: A Detailed Guide
• Oct 13, 2025How To Scan From Brother Printer To Computer: Full Guide
 • Sep 05, 2025